ITK/Release 4/Testing On Demand/Tutorial: Difference between revisions
| Line 62: | Line 62: | ||
And finally, you need to put in the same directory the common script: | And finally, you need to put in the same directory the common script: | ||
* [[ | * [[https://www.kitware.com/svn/CDash/trunk/scripts/cdash_client_common.ctest cdash_client_common.ctest]] | ||
that is included at the bottom of the client script. | that is included at the bottom of the client script. | ||
Revision as of 23:49, 13 September 2011
Overview
Two steps are required to make your computer available to the InsightToolkit project for testing.
How to Setup a Client
A cdash@home client is a computer that is donating time to CDash. It makes itself available to run testing tasks that other customers, such as the Gerrit review system, may request from CDash.
XML Description
Place an XML description of your client machine, whose name is perhaps awesomebox, in an XML file, e.g. awesomebox.cdash.xml.
 <?xml version="1.0" encoding="UTF-8"?>
  <cdash>
    <system>
      <platform>Linux</platform>
      <version>Ubuntu</version>
      <bits>64</bits>
      <basedirectory>/home/ibanez/Dashboards/cdashclient_workspace/</basedirectory>
    </system>
    <compiler>
      <name>gcc</name>
      <version>4.4.3</version>
      <generator>Unix Makefiles</generator>
    </compiler>
    <cmake>
      <version>2.8</version>
      <path>/home/ibanez/local/bin/cmake</path>
    </cmake>
    <program>
      <name>git</name>
      <version>1.7.0.4</version>
      <path>/usr/bin/git</path>
    </program>
  </cdash>
CTest script
A CTest script to advertise your availability to the CDash server. Pit this in a file such as awesomebox.ctest.
# These variables define the system and should be set
# In the future CTest might be able to determine this automatically
set(CDASH_SITENAME "awesomebox")
set(CDASH_SYSTEMNAME "Ubuntu-64bits")
get_filename_component(_thisdir "${CMAKE_CURRENT_LIST_FILE}" PATH)
set(CDASH_SITE_CONFIG_FILE "${_thisdir}/awesomebox.cdash.xml")
set(CDASH_TEMP_DIRECTORY "${_thisdir}/workspace/tmp")
set(CTEST_EXECUTABLE "/usr/bin/ctest")
set(CTEST_DROP_SITE "www.cdash.org")
set(CTEST_DROP_URL "/CDash/submit.php")
set(CDASH_LOOP_DURATION 64800) # Available for 18 hours / day
# Now include the common setup for cdash
include(cdash_client_common.cmake)
Common Script
And finally, you need to put in the same directory the common script:
that is included at the bottom of the client script.
Run It
you run the ctest script the usual way with CTest
ctest -S macondo.kitware.ctest -V
The system will reply with a message similar to
 Cannot create directory /Testing/Temporary
 Cannot create log file: LastSubmit.log
 Submit files (using http)
    Using HTTP submit method
    Drop site:http://www.cdash.org/CDash/submit.php?sitename=macondo.kitware&systemname=Ubuntu-64bits&submitinfo=1
    Uploaded: /home/ibanez/Dashboards/cdashclient/cdash-home/macondo.kitware.cdash.xml
    Submission successful
 SiteId=13
 2: Nothing to do...
 22: Nothing to do...
 ...
The client will ping the server every 30 seconds (this value may change in the future) to check if the server has any new tasks for the client.
How to Schedule a Testing Task
In order to schedule a testing task in CDash you should execute the following steps:
Login into CDash
- Log into a Dashboard project
- Go to the CDash page of your account
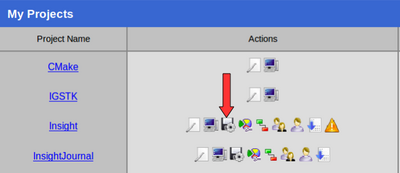
- For example
Select the Scheduling Icon
- Click on the icon of a Floppy disk with a Gear on top
- Marked as "Schedule Build"
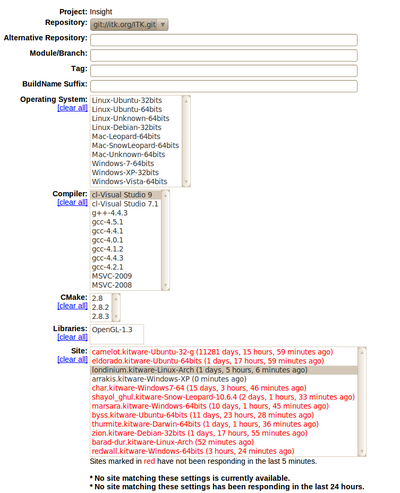
- This will show the available machines and their platform features.
- The "Schedule Build" icon is available only to CDash users whose project role is "project administrator."
The top of the web interface looks like:
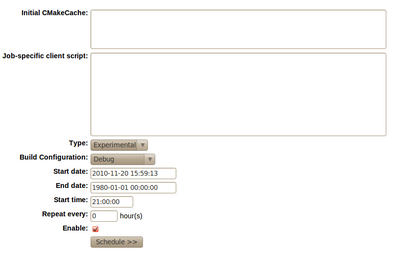
and the bottom of the same page looks like:
Select a Client
Select a client or clients by clicking on the
- Architecture list
- Compiler list
and finally going to the bottom of the interface and clicking on the "Schedule" button.


