CMake:Eclipse UNIX Tutorial
Obtaining Eclipse + CDT
Eclipse IDE is an IDE written in Java that was initially use for developing java programs. In the years lots of projects have used eclipse as a base for their own applications. One such project is the "C/C++ Development Tools" or CDT. The home page is. here
You can download a CDT Version of Eclipse that does NOT include all the other Java Development tools here. Just select the "Eclipse IDE for C/C++ Developers" link on that page.
CMake Editor Plugin for Eclipse
There is also an editor plug-in for Eclipse available (see above): CMake Editor.
Eclipse + CDT Version Information
CDT 3.1.2 goes with Eclipse 3.2
CDT 4.0 goes with Eclipse 3.3.
I highly recommend CDT 4.0 as the feature set is vastly improved, most notably the indexer which has become super fast. The syntax highlighting improvements are also very nice. There are now at least 3 C/C++ code formatters available (or edit/create your own style rules). Numerous other improvements are also incorporated into the release. Eclipse 3.3 does require Java 1.5 (5.0) jvm.
Basic Tutorial
Eclipse CDT supports projects that already provide a makefile so this is good news for CMake users.
The basic steps to get Eclipse + CDT + CMake working are:
  1) Use CMake to generate makefiles for your project
  2) Create a new project in Eclipse using the top level directory of your project as the "Project Directory". The type of project to create should be a "Makefile C++"
  3) Create an "External Tool" to run cmake from within Eclipse
Eclipse CDT can interoperate with CMake by creating a "Standard Makefile" project, running CMake, and then having CDT to run make on the generated makefiles. Eclipse CDT works better if the build files are somewhere in project directory such as a subdirectory (for example Build).
A typical workflow would be something like this.
In a terminal program "cd" into the top level of your project directory ideally where your CMakeLists.txt file resides. Create a directory called "Build". cd into Build and then run ccmake/cmake using the parent directory as the target for cmake. So, for example if we have a project called "MyGreatProject" located in /Users/mike/Projects, then the terminal commands would look like the following:
[mjackson@Thor:]$ cd /Users/mike/Workspace/MyProject
[mjackson@Thor:]$ mkdir Build
[mjackson@Thor:]$ cd Build
[mjackson@Thor:]$ ccmake ../
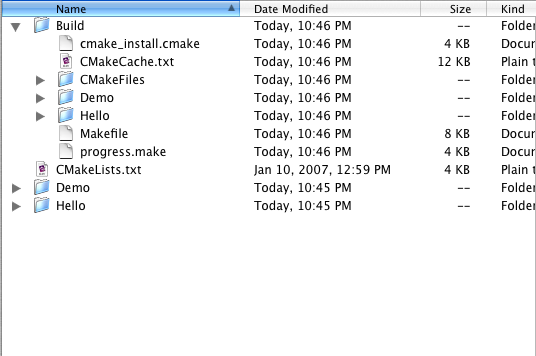
Image showing the basic Project setup for our tutorial.
At this point we have bootstrapped the process somewhat so Eclipse throws less errors when we setup the Eclipse Projects.
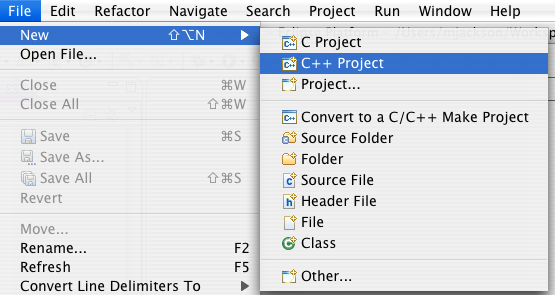
Launch Eclipse and go to "New->C++ Project" Menu
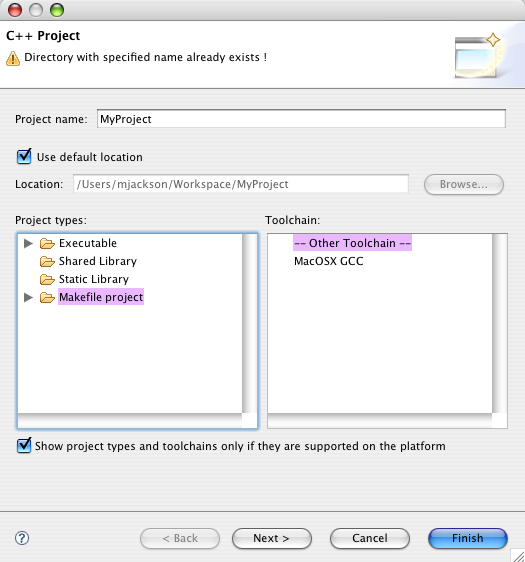
Select the MakeFile Project type
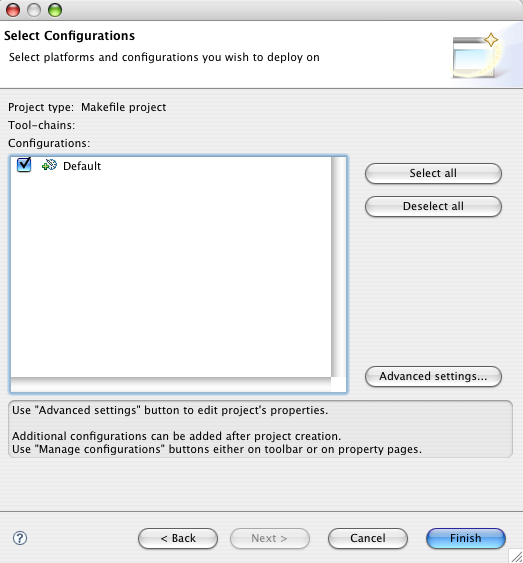
Select the Advanced Settings Button
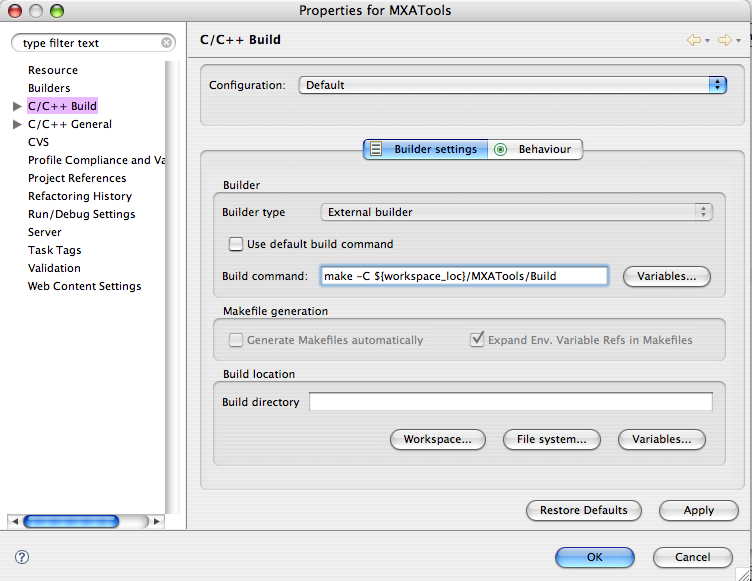
Uncheck the Use Default Build Command
Insert the following in the Build Command Text Field: make -C ${project_loc}/Build
Click on the OK Button. Your project is now ready.
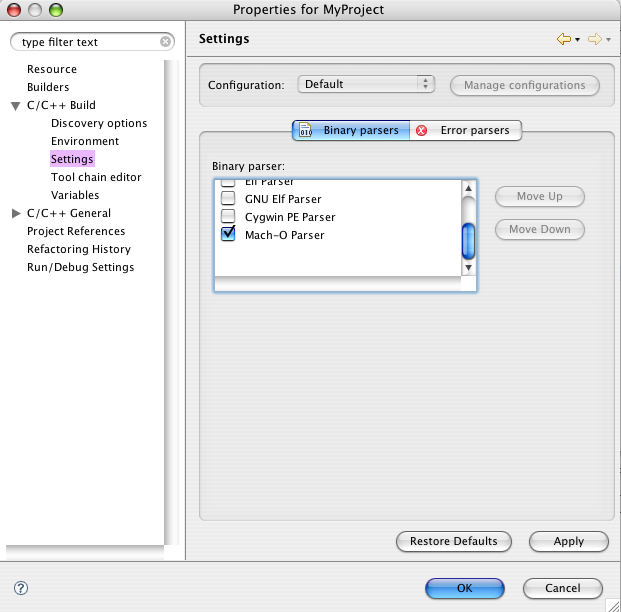
Disclose the "C/C++ Build" options, and select "Settings". In the Right Side pane select the binary format for your system.
| Our Finished Project showing off some of the C++ semantic highlighting capabilities |
Eclipse showing the CMakeEditor Plugin |
|---|---|
Go through the wizard making the appropriate selections and entries.
At some point during this wizard there will be a tab that allows you to over ride the standard "make" command invocation. The tab may have a title such as "Make Builder". Uncheck "Use default" and enter the following into the "Build Command" text field.
"make -C ${project_loc}/Build" ( Without the quotes). For multi-core systems and if you want to use multiple compile jobs, then use:
make -j2 -C ${project_loc}/Build (where '2' is the number of jobs to use.Adjust for your own system)
There will also be another tab called "Binary Parsers". Select that tab and be sure that the appropriate binary type is selected for your system. Continue on with the wizard until finished.
Your new project should now be ready. Select the project in the C/C++ Projects view then select the "Project->Build Project" Menu to build your project.
Now, technically you _could_ use a completely out of source build and this will work with eclipse, but eclipse will be unable to find your binaries when finished, which makes the setup of debugging and running your app from Eclipse a bit more tricky.
Creating an External Tool to run cmake
If you edit your CMakeLists.txt file, then you will need to go back out to your terminal and rerun cmake. OR you can create an external program launch configuration and run cmake from within eclipse. To do this select the "Run->External Tools->Show External Tools Dialog..." menu. Create a new "Program" and call it Cmake. in the "Location" text field, type the absolute path to cmake (/usr/local/bin/cmake). If the "Working Directory" area insert the following: "${project_loc}/Build" and in the Arguments section insert the following: "../". In the "Refresh Tab" Select ""The project containing the selected resources". In the "Common" tab check the "External Tools" selection. This will put a shortcut in the "Run" menu for you. Click the Apply Button and then run. cmake will now run on your project directory.
Parsing Errors more efficiently
The CDT Error Parser cannot handle error messages that span more than one line, which is the default gcc behavior. In order to force gcc to generate single line error messages with no line wrapping, add to your CMakeLists.txt:
IF(CMAKE_COMPILER_IS_GNUCC)
  SET(CMAKE_C_FLAGS "${CMAKE_C_FLAGS} -fmessage-length=0")
ENDIF(CMAKE_COMPILER_IS_GNUCC)
IF(CMAKE_COMPILER_IS_GNUCXX)
  SET(CMAKE_CXX_FLAGS "${CMAKE_CXX_FLAGS} -fmessage-length=0")
ENDIF(CMAKE_COMPILER_IS_GNUCXX)
Automatic Discovery of Include directories and other compiler items
In order for the CDT discovery mechanism to catch the compiler options and definitions automatically from the build output, enable the "Enable build output info discovery" in the project properties and set the CMAKE_VERBOSE_MAKEFILE variable in your CMakeLists.txt.
SET(CMAKE_VERBOSE_MAKEFILE ON)
If you don't want to hard-code this behavior in CMakeLists.txt, you can achieve the same effect by telling CDT to invoke make as
make VERBOSE=1

